Want to change the background of your videos with Kinemaster?
You’re in the right spot! This guide will show you how to easily swap out any video background with Kinemaster in 2024. Whether you’re using a green screen or just changing the backdrop, this step-by-step tutorial will make it super easy.
Changing the background of a video used to be tricky, but with Kinemaster, it’s easy and quick. Kinemaster has many tools that let you change your video’s background without hassle. Ready to learn how? Let’s get started!
Why Change a Video Background?
Before we start, let’s talk about why you might want to change a video background. Whether you’re making a professional video, spicing up a personal clip, or just trying out new looks, changing the background can make your video look more polished and creative.
What You’ll Need
To get started, ensure you have the following:
- Kinemaster App: Installed on your device.
- Video with Background: The video whose background you want to change.
- Background Video: The new background you want to apply.
How to Change Video Background in Kinemaster?
Step 1: Open a New Project in Kinemaster
First things first, open Kinemaster and start a new project. Import the video you want to use as your background. This will be the backdrop that you’ll be using to replace the existing one.
Step 2: Add Your Video Layer
Once you’ve imported the background video, click on the Layer option. From there, select Media to choose the video whose background you want to change. This is the video that will have its background removed.
Step 3: Full-Screen Your Video
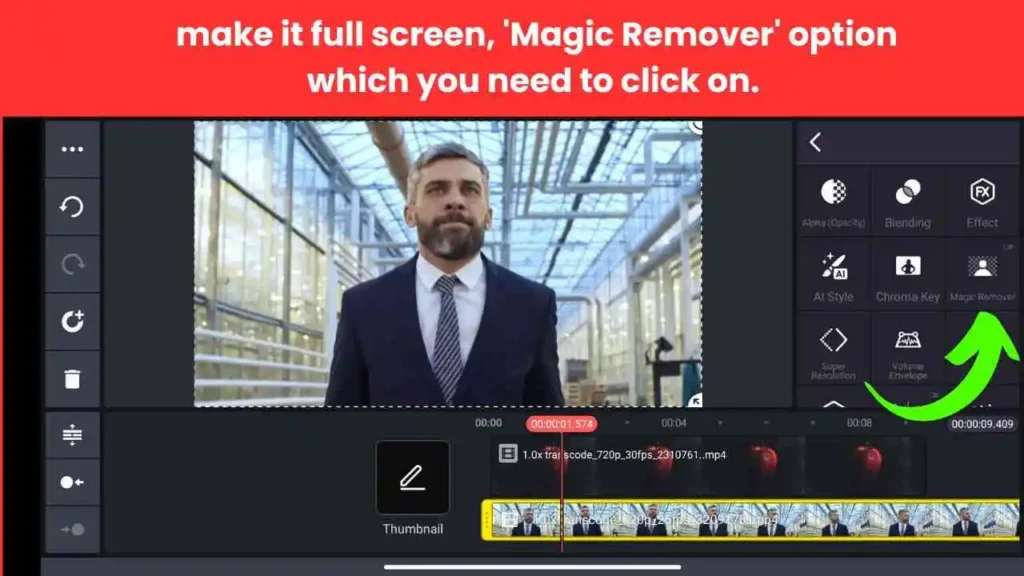
After importing your video, make sure it’s displayed in full screen. On the right side of the screen, you’ll see several options. Click on Magic Remover to start the process of removing the background.

Step 4: Start Background Removal
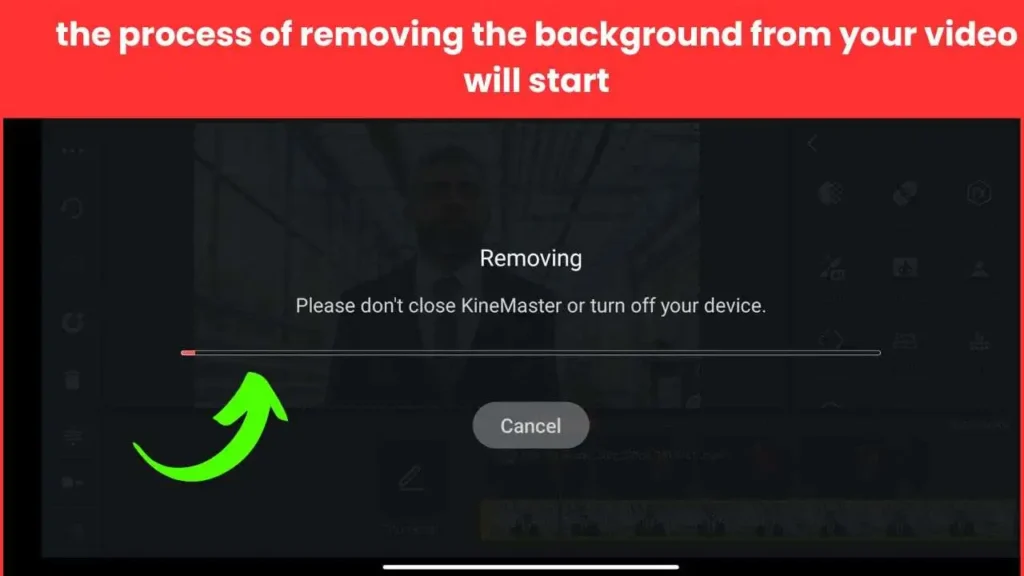
Clicking on Magic Remover will initiate the background removal process. Depending on the length of your video, this might take some time. Be patient and wait for the process to complete.

Step 5: Review and Finalize
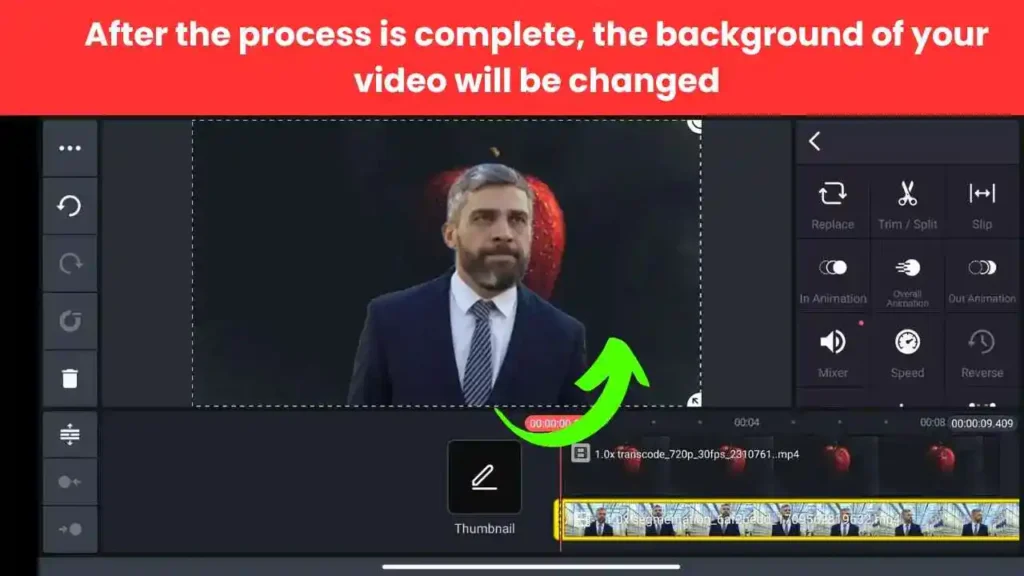
Once the process is finished, the background of your video will be successfully changed. You can review the results and make any necessary adjustments. The image below shows an example of a background change.

Step 6: Export Your Video
With your video now complete, you’re ready to save it. Click on the Export option to save your edited video to your gallery.
How to Export Your Video?
Step 1: Tap Export in the top right corner.
Step 2: Choose your desired resolution and quality settings.
Step 3: Save the video to your gallery or share it directly.
Conclusion
We hope this guide has made it easy for you to change the background of your video using Kinemaster. Just follow these simple steps, and you can switch up any video background to match what you want. For more helpful tips and tutorials on Kinemaster, check out our website. Thanks for reading!